How to Use Photoshop’s Refine Edge Tool for Perfect Selections
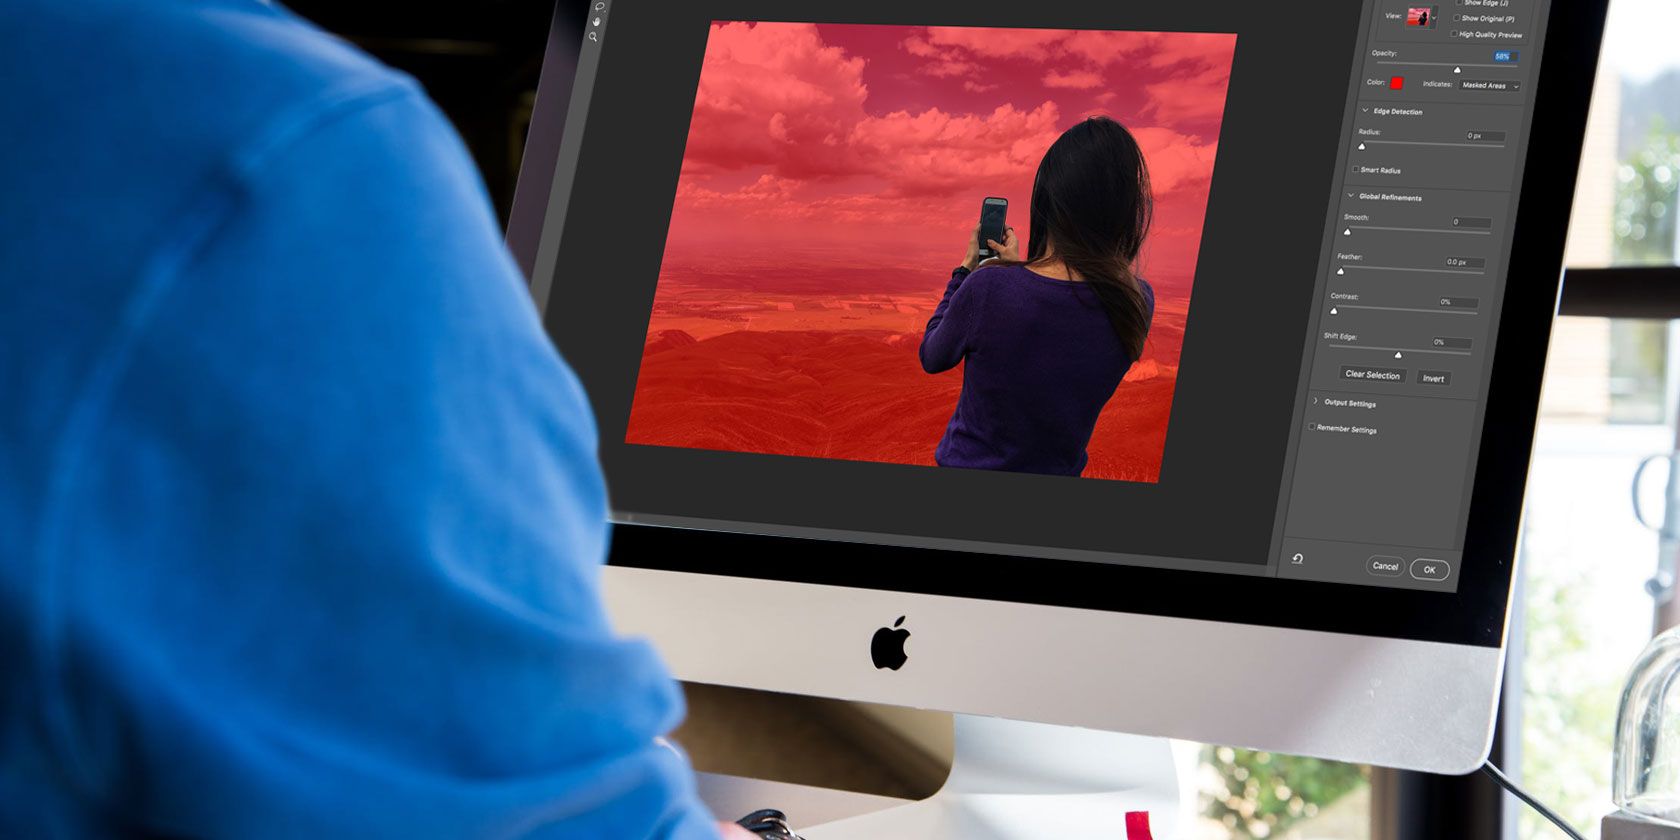
When you’re working with images in Photoshop, getting perfect selections lets you work in great detail. But the pen and lasso tools don’t make it easy to capture small details in complex areas. The magic wand tool can help, but it’s unpredictable.
If your selection isn’t spot-on, though, your design will suffer. So what are you to do?
Worry not, as Photoshop’s Refine Edge tool can come to the rescue. It’s now hidden behind the new Select and Mask tools, but it’s still one of the most useful functions that Photoshop CC has to offer. Let’s check it out.
When to Use Refine Edge in Photoshop
You can use Refine Edge on any image, but it really shines when you have a foreground that you’re trying to select against a contrasting background.
It’s also best when you’re working with complex edges, like hair (which we’ll be using for this tutorial). Anything with straight lines is easy enough to get with the pen tool. But lots of small projects, transitions, and blank spots will benefit from the Refine Edge tool.
Once you learn how to use it, you can employ the tool on any image. It’s especially good when you’re changing the background of an image. But in time you’ll learn which images it’s best used on.
Let’s take a look at how to use Refine Edge.
Step 1: Make a Loose Selection
You can use the Refine Edge tool on an entire image, but you’ll get better results if you help Photoshop focus on the area you’re interested in. Here’s the image we’ll be using:

To isolate the subject from the background, we’re going to have to get a selection that includes her hair. Especially on the left side, that would be difficult—if not impossible—with the pen tool.
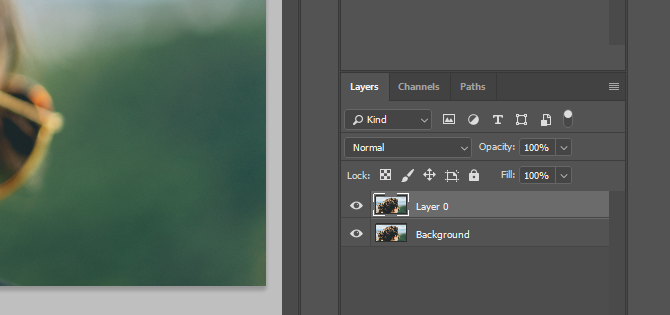
Before we start using Photoshop’s Refine Edge tool, though, it helps to make a general selection. First, duplicate the layer by right-clicking Layer 0 and selecting Duplicate Layer. We’ll name the new layer “Background”.
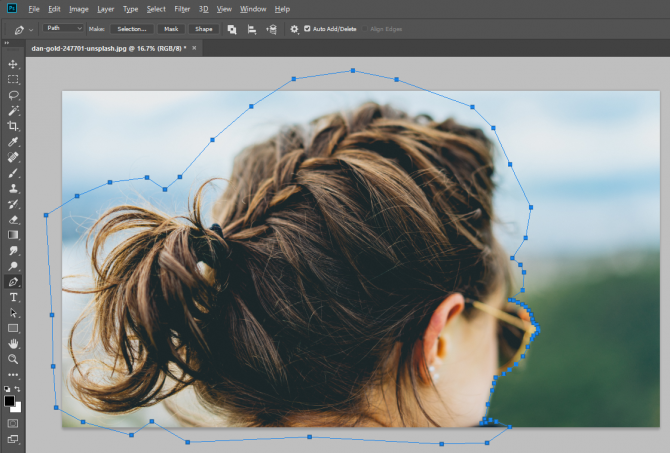
We’ll use the pen tool to outline the woman’s face and narrow down the selection around her hair.
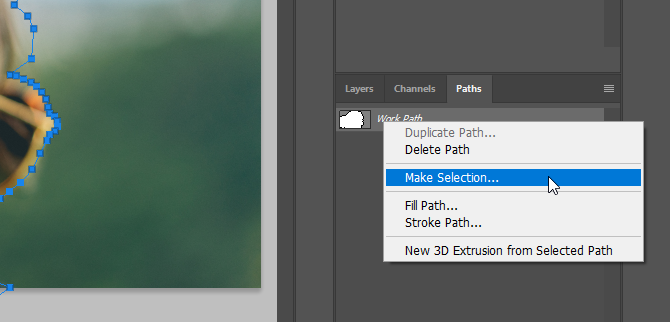
Now, select the Paths tab, right click Work Path, and turn this path into a selection.
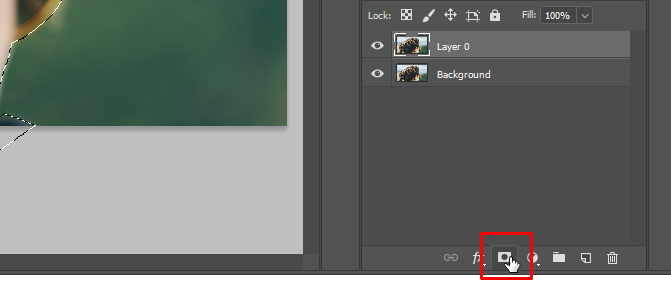
Finally, turn that selection into a layer mask.
Step 2: Open Select and Mask Tools
Nothing happens to the image when you add the layer mask. To see your selection more clearly, make the background layer invisible.
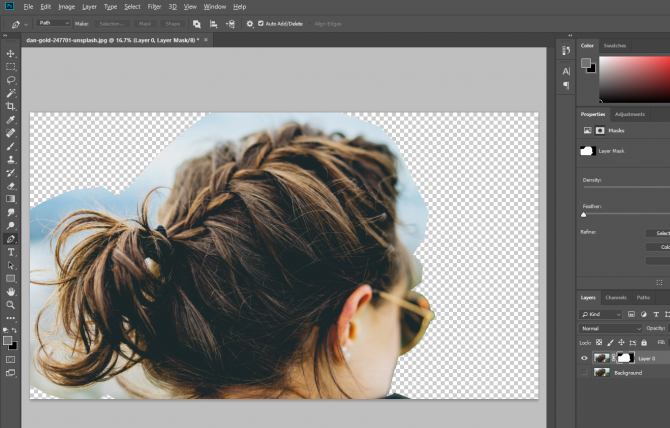
Now we have a better idea of what we’ve actually selected. To get to the Refine Edge tool, we’ll need to open the Select and Mask window. Select the rectangular marquee tool (keyboard shortcut M) or the lasso tool (keyboard shortcut L).
You’ll see a button in the menu bar that says Select and Mask. Click that button to open a new window.
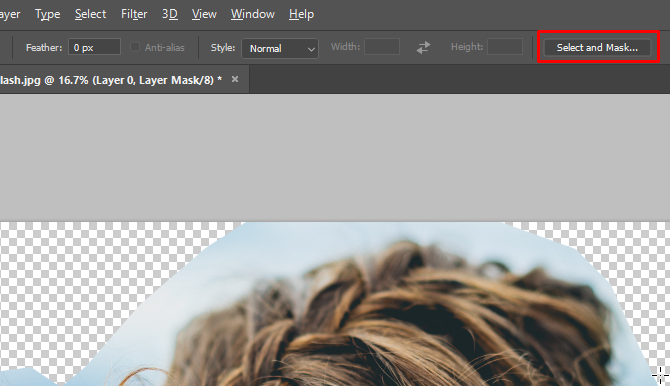
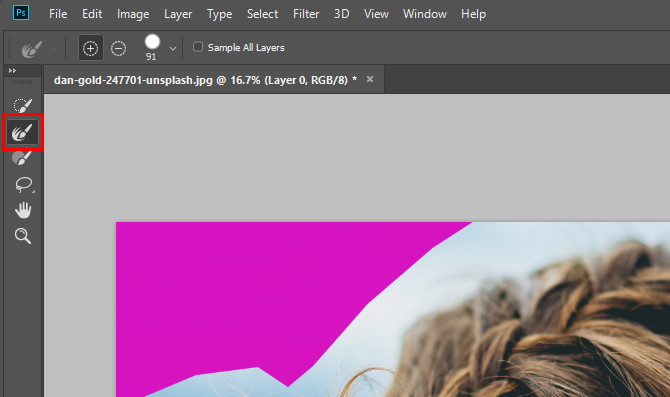
Note: To make it a bit easier to see where the Refine Edge tool makes changes, I’ve added a layer and filled it with pink.
Select the Refine Edge Brush Tool.
Step 3: Brush on Your Selection
With this tool selected, we’ll brush around the edges that we want Photoshop to refine. Before we start, though, you may want to change the size of the brush. There’s a brush-size dropdown in the menu bar that lets you quickly increase or decrease the brush size.
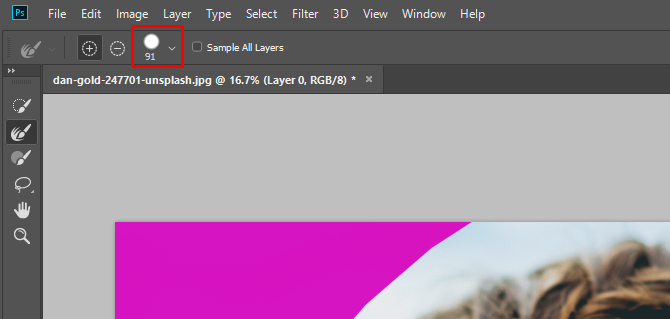
It can be helpful to start with a larger brush and then move to a smaller one as the selection gets finer.
Now, brush over the area.

Photoshop extracts contrasting pixels for your selection much faster than you could with a manual tool. As you can see, the selection isn’t perfect. But it’s a lot faster than manual methods. Keep brushing until you get the selection you want.

Step 4: Tweak the Selection
Once you’ve made your selection with the Refine Edge tool, it’s time to make a few tweaks to improve it. The first thing to try is Decontaminate Colors. In the Properties tab, scroll down until you see the Decontaminate Colors checkbox. Click it and check out the results.
Here you can see the difference between the two options:

In our case, some of the edges get a bit sharper, so we’ll leave the decontamination on.
Below this checkbox, you’ll find the Output To: dropdown. You can send this selection to a new layer mask or to the existing mask. We’ll select Layer Mask to add it to our current mask.
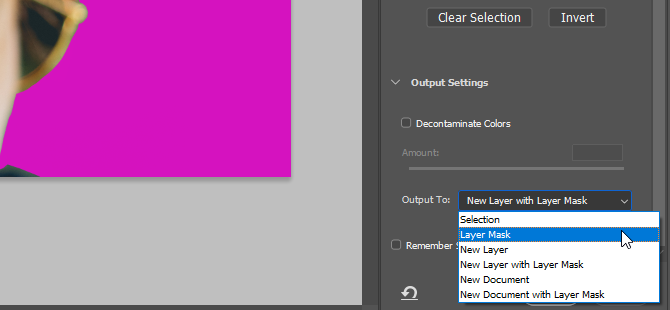
Click OK.
Now we can make a few more tweaks. For example, in this area, the Refine Edge tool made part of the woman’s hair transparent.
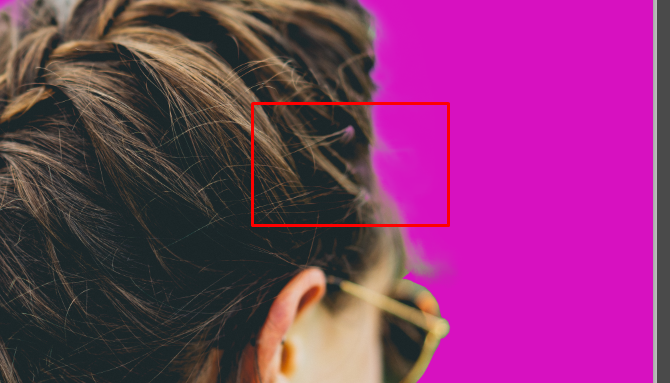
Select the layer mask and the brush tool (keyboard shortcut B). Set the foreground color to black and paint over the area that’s been misselected.

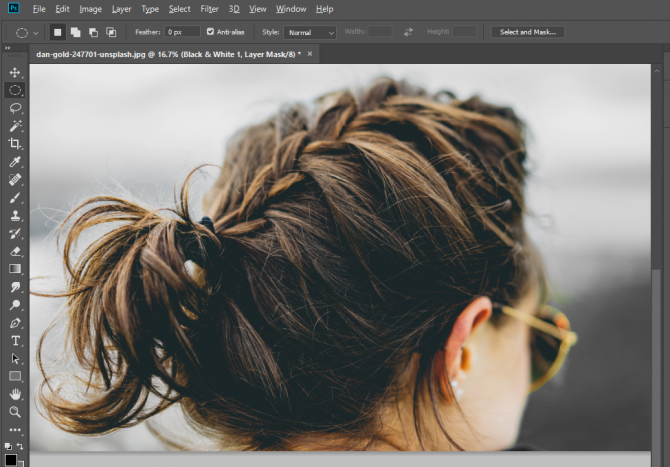
You can use a brush to clean up any of the selection that you’re not happy with. Once you’ve selected the area you want, you can start making adjustments to your background. (I’ve added an adjustment layer to turn the background black and white for a selective-color look.)
Now Keep Practicing With the Refine Edge Tool
While Photoshop’s edge-detection tools are very advanced, they’re not perfect. So you’re going to need to practice working with them and tweaking your final selections. You might feather the selection to capture a bit of the foreground and a bit of the background. Or use a very small brush to catch even smaller details that Photoshop didn’t.
You can also play around with the Refine Edge settings, like Feather and Contrast, to see how they affect your selections. Like any other tool in Photoshop, it takes a while to get proficient with Refine Edge.
But with practice, you can become an edge-refining master, and you’ll be well on your way to mastering all kinds of Photoshop techniques.
Read the full article: How to Use Photoshop’s Refine Edge Tool for Perfect Selections

