External Hard Drive Missing on Your Mac: 8 Possible Fixes You Should Try
Most of us use external hard drives and USB flash drives from time to time. You can use iCloud or buy a bigger MacBook to reduce your reliance on external drives, but they’re still a necessary evil.
It can be a frustrating experience when your external hard drive doesn’t show up (or misbehaves in another way). Fortunately there’s a long list of fixes you can try to isolate and hopefully fix your issue fairly quickly.
In some instances you might find that it’s impossible to recover your drive. This is why the 3-2-1- backup rule is so important.
Before We Begin: Read-Only Volumes and NTFS
If your external hard drive is showing up but you can’t write to it, it’s likely using a file system that your Mac cannot write to. Many Windows external drives are formatted to NTFS by default, and macOS doesn’t include an NTFS driver. In order to write to your drive, you’ll need to install a driver with support for that file system.
You can get your hands dirty and fix read-only problems for free with an open source solution, or by enabling macOS experimental NTFS support. Alternatively, paid options like Paragon NTFS ($20 per Mac) or TuxeraNTFS ($31 for all home computers) will quickly restore access to your NTFS volumes.
1. Connect Your Drive and Check /Volumes/
All connected and mounted volumes will show up in your /Volumes/ folder. Launch Finder and in the menu bar, click Go > Go to Folder. Then type /Volumes/ and hit Enter. You’ll be taken to a folder that shows you all mounted drives and disk images.

If you find your drive here, try accessing it. If you’re used to seeing (or would rather see) your drive appear on your desktop, launch Finder and in the menu bar head to Finder > Preferences > General. Check the boxes to determine which drives show up on your desktop.
2. Check Disk Utility
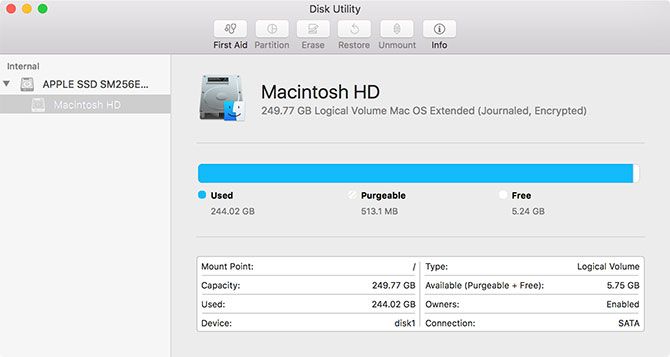
Launch Applications > Utilities > Disk Utility (or just search Spotlight for it). This system utility lists all connected drives, with mounted or unmounted partitions listed below. If your drive shows up but the partition isn’t mounted (shown grayed out), try right-clicking the partition and choosing Mount.
If your drive still isn’t accessible, you might want to try selecting the drive or affected partition then clicking First Aid. Disk Utility will check the volume for problems, and if it detects any you’ll be given the option to Repair Disk. If the drive isn’t writeable or supported by macOS, First Aid can’t do anything.

If your drive appears in Disk Utility but you are unable to mount any partitions, you may still be able to recover data from that drive. There are plenty of good Mac data recovery tools, with TestDisk and PhotoRec being two of the best.
If you’re not concerned with your data and simply want the use of your drive back, feel free to use the Erase tool in Disk Utility to create a new partition.
3. Rebuild the Launch Services Database
Some users have reported success in getting their previously missing drives to show up by rebuilding the macOS launch services database. Apple describes this as “an API that enables a running application to open other applications or their document files in a way similar to the Finder or the Dock.”
You can rebuild the database by downloading and installing free maintenance app OnyX. Launch it and input your administrator password so that OnyX can make changes. The app may ask to verify the structure of your desk; click Continue and wait if so. OnyX will appear unresponsive while the process completes.

Once OnyX comes back to life, click on the Maintenance tab followed by Rebuilding. Make sure that LaunchServices is checked (you can uncheck the rest) then click Run Tasks at the bottom of the window. While this happens, Finder may become unresponsive.
Once the process is complete, restart your Mac. Try reconnecting your missing drive once it reboots.
4. Cycle USB Ports and Cables
Ports and cables are physical connections, and they’re prone to wear that can lead to total failure. If your external HDD isn’t showing up, try using another USB port to see if that makes a difference. If the drive shows up, it indicates there’s a problem with that particular USB port (you may be able to fix this in section seven, below).

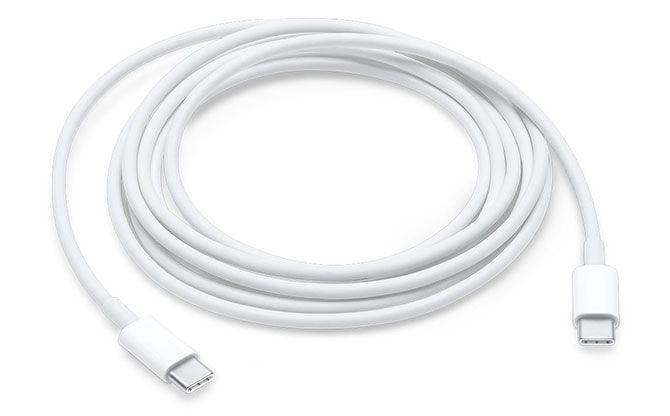
And if that doesn’t work, turn your attention to the cable. If you haven’t used the drive in a long time, check you’ve got the right type of cable. Some older drives require USB leads with separate power connectors. Even older drives require dedicated DC power adapters, so make sure you’re not missing one of them.
You can try switching out the cable for another and seeing if that makes a difference. If you’re troubleshooting a USB flash drive, check the connector for signs of damage.
5. Try Another Computer
You can confirm whether or not the drive is faulty by trying to connect it to another computer, if you have one. Ideally you’ll want to try another Mac, but a Windows PC is worth a shot too. If you have access to both and your drive refuses to show up on any Apple hardware, it’s worth considering the possibility that it’s simply not compatible.
Though it’s rare to encounter this issue with modern hardware, some USB devices need to install drivers before they will work on certain operating systems. This is especially true for many “secure” USB drives that use some sort of software encryption to prevent unwanted access.
One potential solution is searching online for your particular brand and model. Manufacturers may have included Mac drivers as a separate download.
6. Update macOS
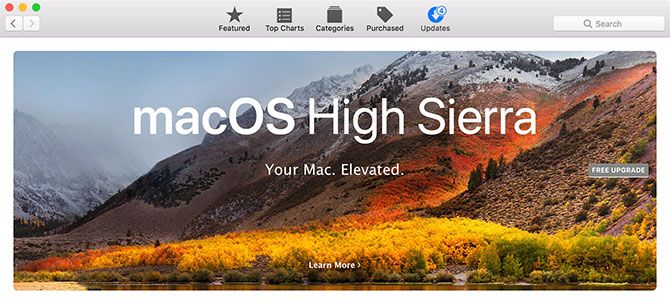
It’s basic advice, but sometimes it helps when your external hard drive isn’t showing up. If you have outstanding updates to apply, try applying them and trying again. In particular, some firmware updates relate specifically to peripherals and devices that connect via USB. Launch the Mac App Store app and head to the Updates tab.

It’s always a good idea to back up your Mac with Time Machine before installing major updates or upgrading macOS to the next major version.
7. Reset SMC and PRAM
If the signs point to your Mac as the source of the problem (or you’re completely out of ideas) you might want to try resetting your system management controller (SMC) and parameter random access memory (PRAM).
Tried resetting the PRAM and SMC on the MAC ? Even disk first aid or whatever the hell they call it now on the external drives ?
— Heartwood Institute (@Heartwood9) April 27, 2018
For issues relating to USB devices, resetting the SMC will provide the best chance of a fix. If that didn’t help, you might want to try resetting PRAM anyway since it can’t really cause your machine any long-term problems.
Instructions differ depending on your particular Mac, so check out our guide to resetting SMC and PRAM for details relevant to your machine.
8. Run Mac Diagnostics to Detect Hardware Issues
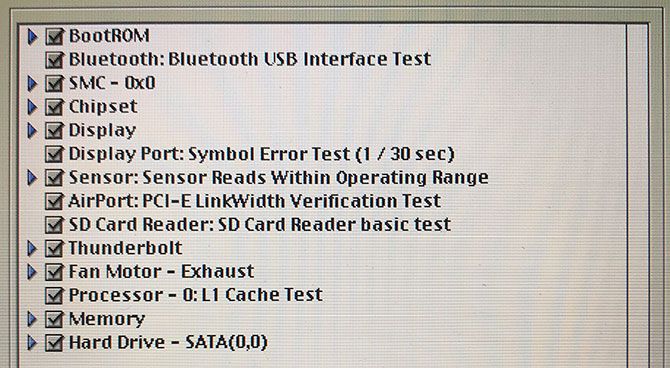
Convinced it’s your Mac to blame and want to know more? You can run Apple’s consumer-friendly hardware tests at home, but they likely won’t tell you much. If you really want to dig deep into the issue, you’ll need to find the Apple Service Diagnostic for your machine and test it extensively.

Apple Service Diagnostic is a set of diagnostic tools used by technicians to find faults. Getting your hands on relevant disk images shouldn’t be too difficult, after which you can create a bootable Apple Service Diagnostic drive for testing purposes.
This isn’t going to fix your machine, but it will confirm or deny your suspicions. If you have a problem with a particular USB port, you might want to invest in a hub to make the most of your remaining connectivity. It might also be time to start thinking about upgrading to another machine, since this could be indicative of bigger problems.
Remember to Safely Eject Your Drives
Not everyone safely ejects their drives, especially small USB flash drives used primarily for data transfer. Larger external hard drives that store a lot of precious data are more worthy of your patience, however. You can eject a drive in several ways:
- Right-clicking it and choosing Eject.
- Using the Eject icon below the Devices section of Finder’s sidebar.
- By clicking and dragging the drive from your desktop or Finder to the Trash in the Dock.
- Using a free menu bar app like Ejector.
By taking the time to make sure nothing is writing to the volume and ejecting it safely, you’ll reduce the odds of ever needing to consult an article like this again. And to decrease your reliance on external drives, check out all the ways to add storage to your MacBook.

